Connect to a System and Analyze
Connect to a System and Analyze
-
From a browser, navigate to the Runecast Analyzer Web Interface URL:
https://<appliance IP>and login with default credentials:- Username:
rcuser - Password:
Runecast!
Tip
Runecast Analyzer is available also as an AMI, available on the AWS Marketplace. Once the instance was configured and launched, navigate to the Runecast Analyzer Web Interface url
https://<EC2 instance public IPv4 address>/rc2and login with the default credentials:- Username:
rcuser - Password:
<EC2 instance Id>
- Username:
-
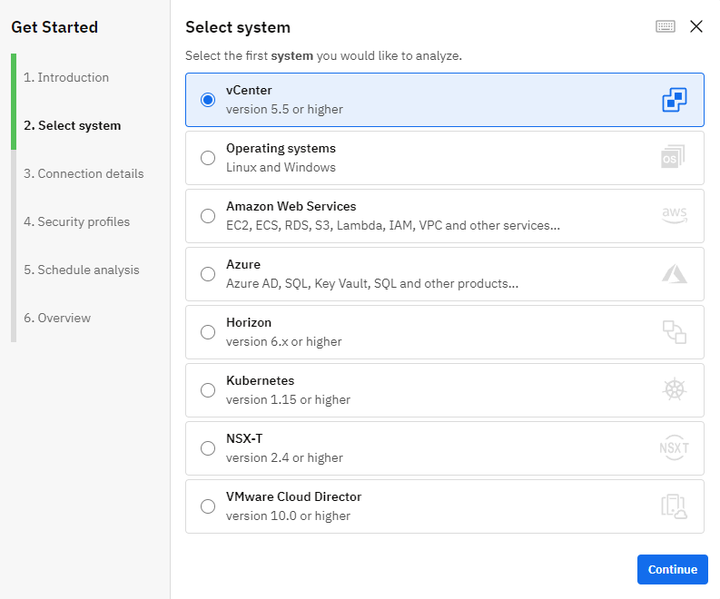
During the first login, no system connections will exist so you will be prompted to configure a connection to your first system. Select the type of the system you want to add (see System Requirements section for required privileges) and Continue to the next step. Or you can skip the onboarding wizard and add systems from the Settings page.
-
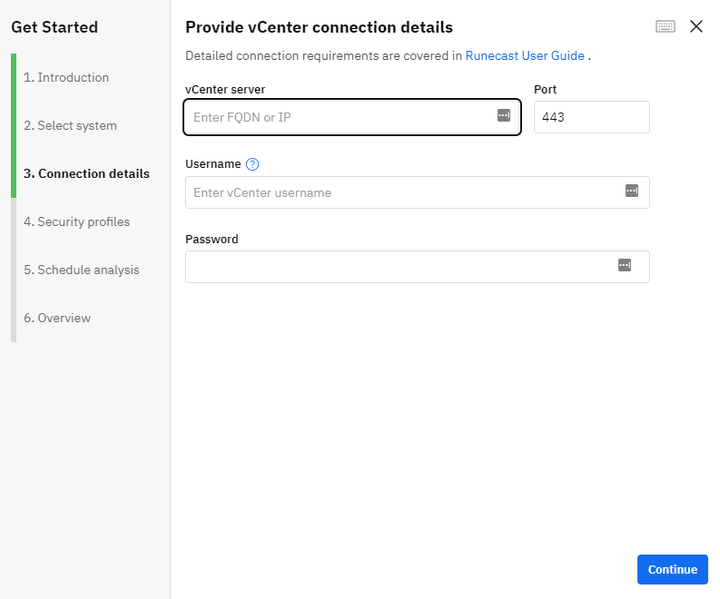
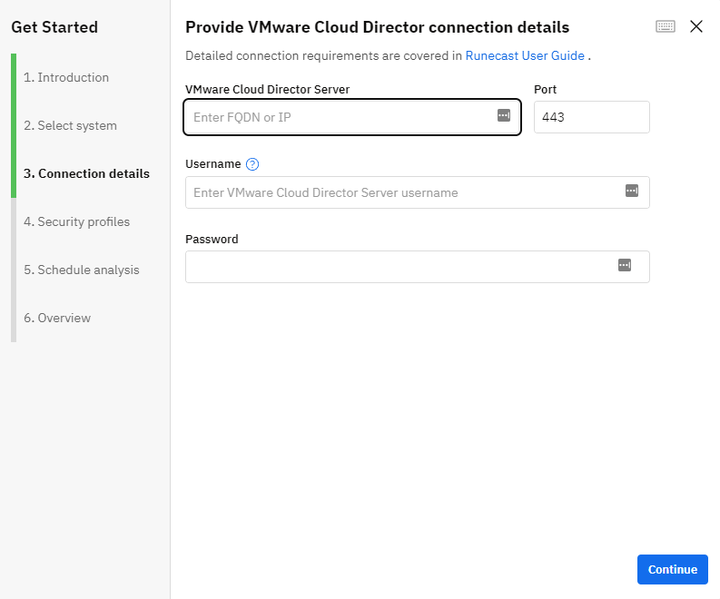
Based on your selection, provide the required connection information and click Continue.
-
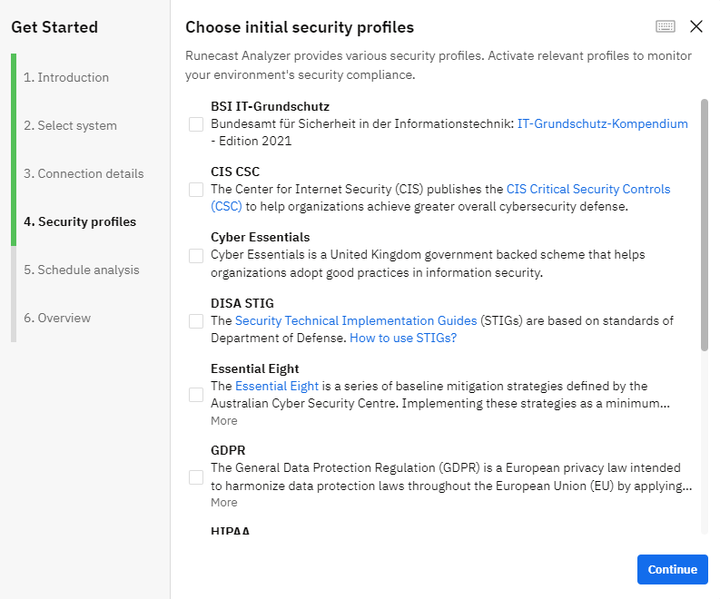
After the successful validation of the connection, you can select one or more security profiles relevant to your organization. Once it is done, Continue to the next step.
-
Automatic scan scheduling can be configured during this step. We encourage you to schedule them to benefit from continuous reporting. Once automatic scanning is selected, the scanning frequency can be chosen. Press Continue to move forward to the final step.

-
An overview of your configurations is displayed in this page. Press Analyze now to trigger your first analysis.
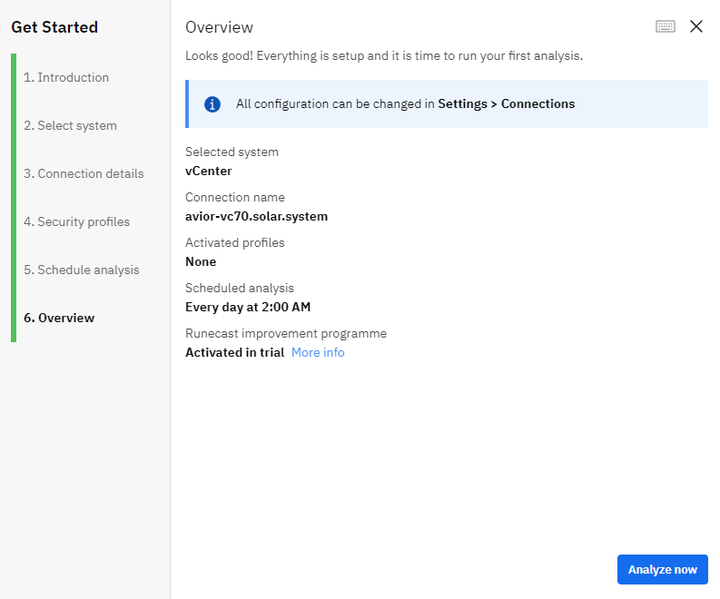
Optionally, you can help to improve Runecast Analyzer bar participating in Runecast improvement programme and sending limited anonymous usage data. To find out more information about the data collected, please see the About Runecast Analyzer page.
Tip
You always have the option to change your preference from the User profile tab under Settings. Once a license has been applied, the data collection will turn off automatically. If you would like to continue sending information to improve Runecast Analyzer, you can turn it on from User profile under Settings.
Adding more systems
To connect additional Systems, navigate to Settings and select Connections tab.
VMware vCenter and NSX-V
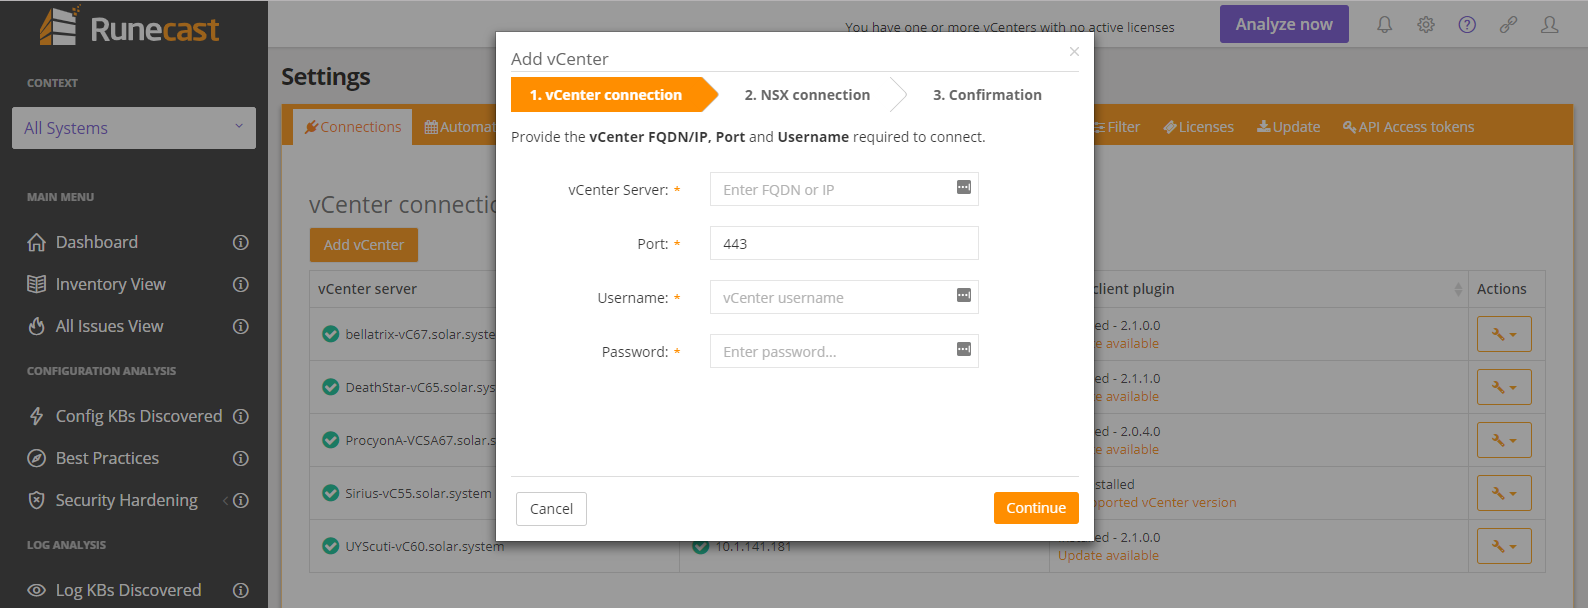
Click Add vCenter button and follow these steps:
-
Enter the vCenter connection information and click Continue to the next step.
-
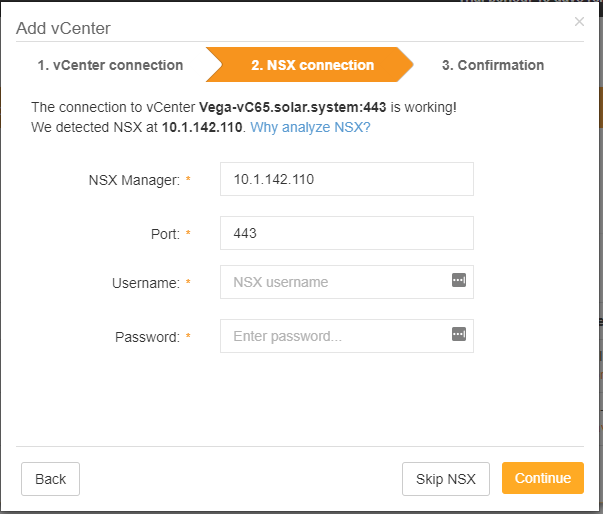
Validate the successful connection to vCenter. During validation, an attempt to automatically detect NSX-V will be in process. If no NSX-V Manager is detected, this step will be skipped. If a NSX-V manager is detected, then the connection settings will be shown. Enter the username and password of an account with at least auditor permissions to add NSX-V to Runecast and benefit from the same functionality Runecast Analyzer offers for vSphere. If you skip setting up the NSX-V connection at this point it can be established later.
-
Click Continue to proceed to the last step.
-
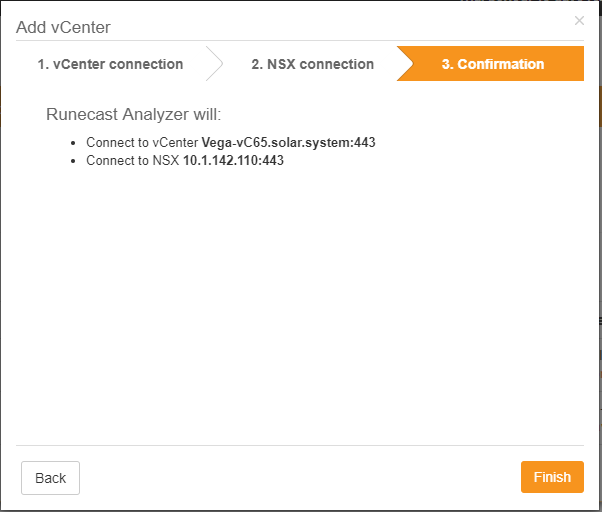
The last step will summarize the actions to be performed by Runecast Analyzer after clicking the Finish button.
Checking status and installing vSphere Web Client plugin
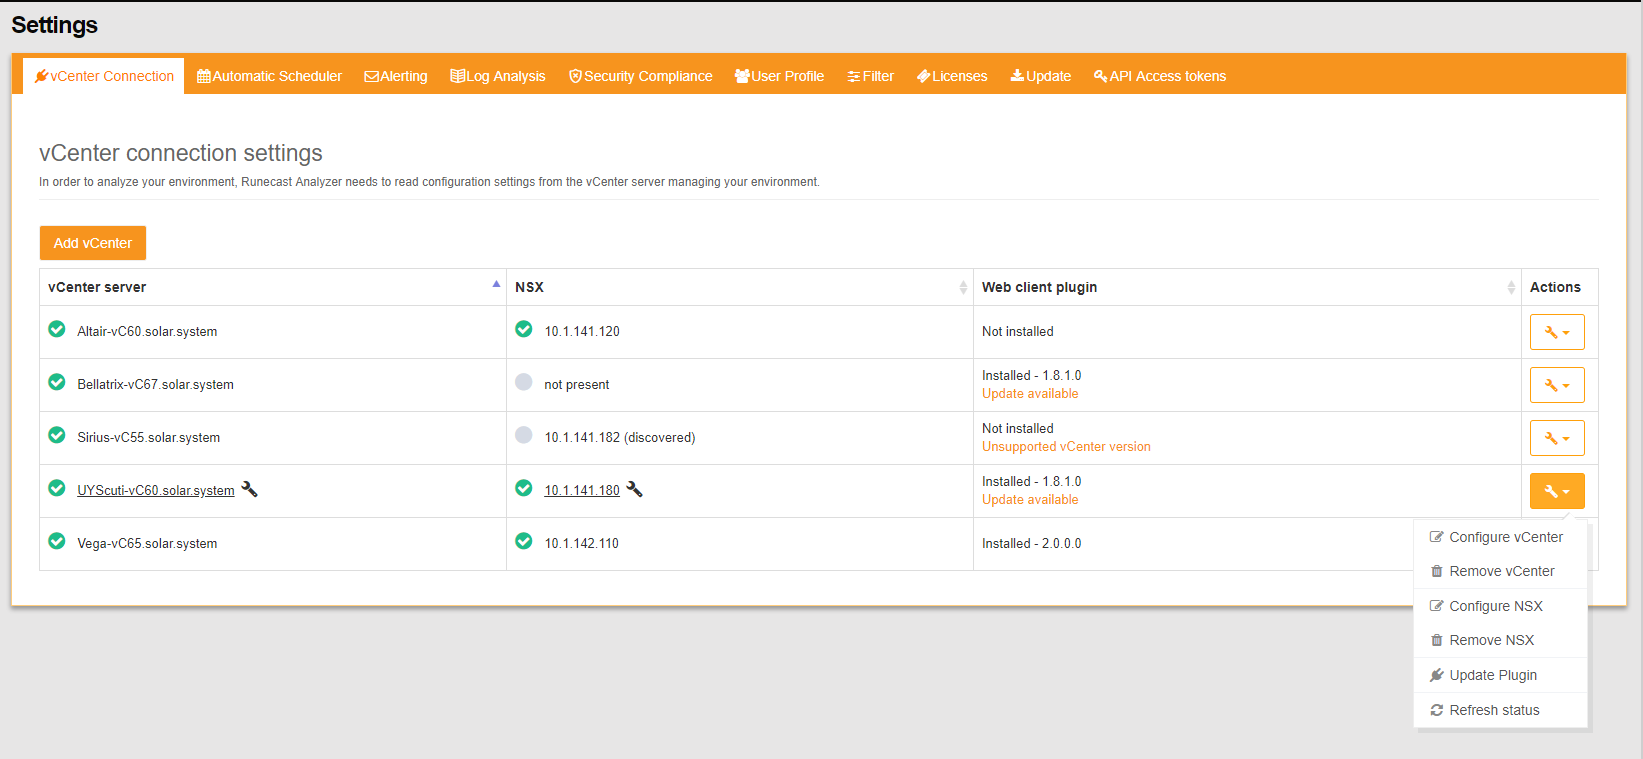
Once you have added one or more vCenters (and optionally, NSX-V Managers) an overview of all connections will be presented including the status of NSX-V and also the Web Client Plugin installation status:
-
The NSX-V column will display one of these states:
- Not present if no NSX-V was found to be connected to vCenter Server
- Discovered if NSX-V was discovered but it was not added to Runecast Analyzer
-
If NSX-V has been added, it will be marked with the symbol
 .
. -
The Web Client Plugin column will display one of the states:
- Not installed
- Installed
Additional operations for Web Client Plugin can be triggered from the Actions button. For more detail about the plugin please read the section Registering the plugin with vCenter Server.
Both vCenter and NSX-V can be reconfigured by using the  button, made available on hover.
Multiple actions can be performed from the dropdown Actions button located on the right side.
Discover the step-by-step process of connecting Runecast to vCenter in this comprehensive tutorial: How to connect Runecast to vCenter.
VMware Horizon
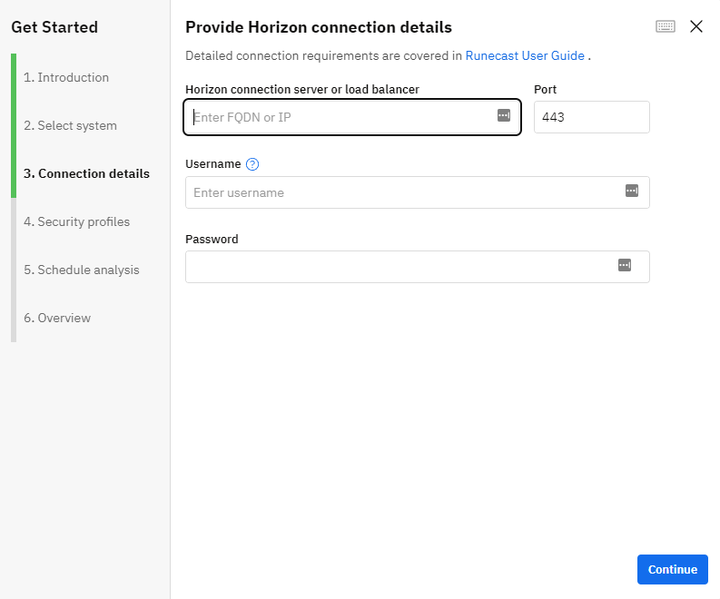
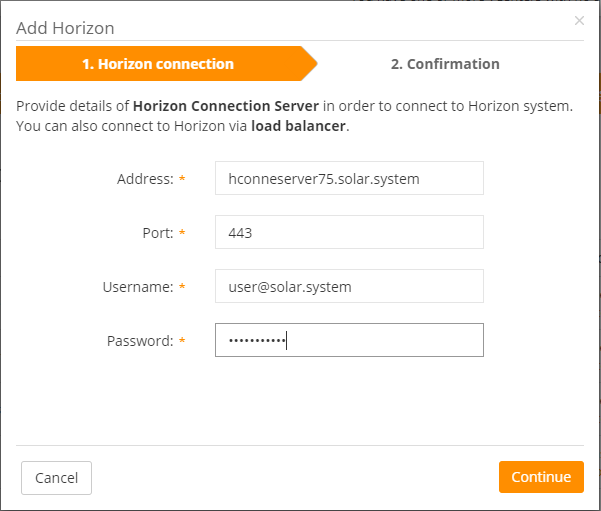
To connect to Horizon Connection Server (or Load Balancer) click Add Horizon button and follow these steps:
-
Provide the Horizon information and click Continue to the next step.
-
Under the Related vCenters tab of the Horizon connection are listed all vCenter Servers which are configured for the particular Horizon environment. For complete and more relevant results it is recommended to add all Horizon vCenter Servers to Runecast Analyzer. The vCenters marked with a checkbox are already connected to Runecast Analyzer. The ones which are missing have an Add vCenter link that will open the interactive dialog to add the vCenter to Runecast Analyzer.
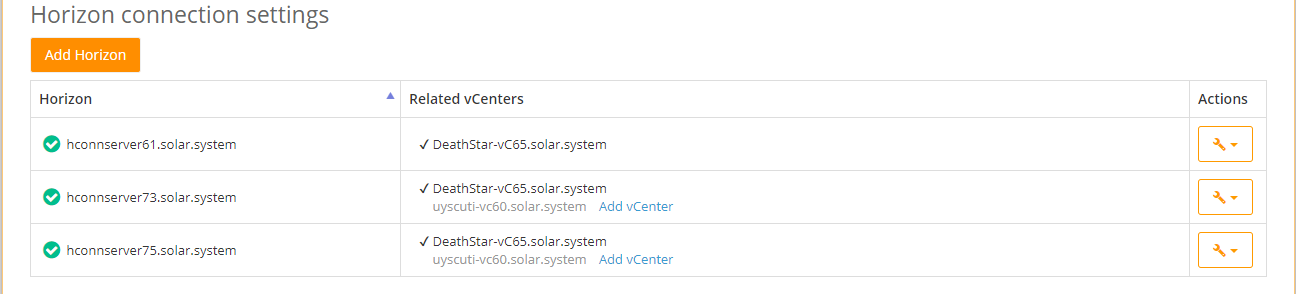
Warning
It is not possible to compare the vCenter Servers UUID prior to Horizon v7.4. If you're using Horizon v7.4 or older, please ensure you add the vCenter Servers in Runecast with the same name as added in Horizon.
AWS
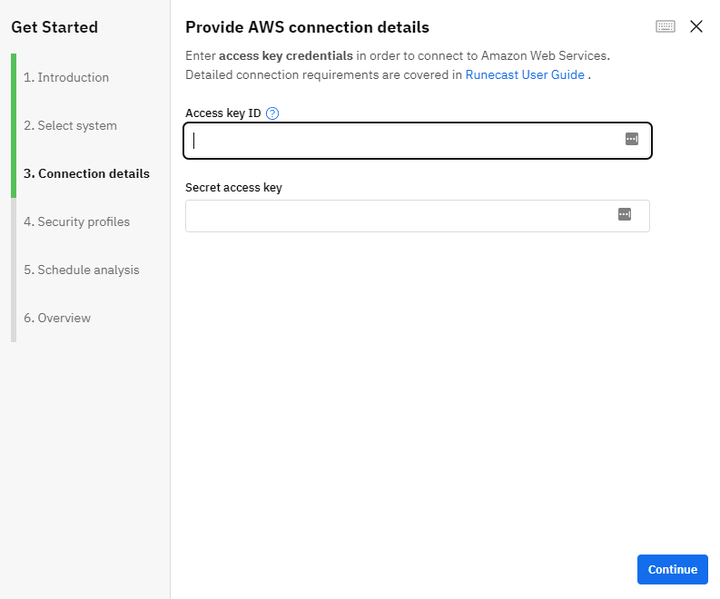
To connect to Amazon Web Services, click the Add AWS button. Depending on the deployment type (self-provisioned or deployed via AWS Marketplace), there are two authentication options that can be used. Select the desired authentication method from the dropdown menu:
Access key authentication
Provide the AWS access key credentials and click Continue to the next step.

Role-based authentication
Info
IAM role-based authentication is supported only when deploying Runecast Analyzer via AWS Marketplace
Provide ARN of a role that will be used to establish access with the desired AWS account and click Continue to the next step.
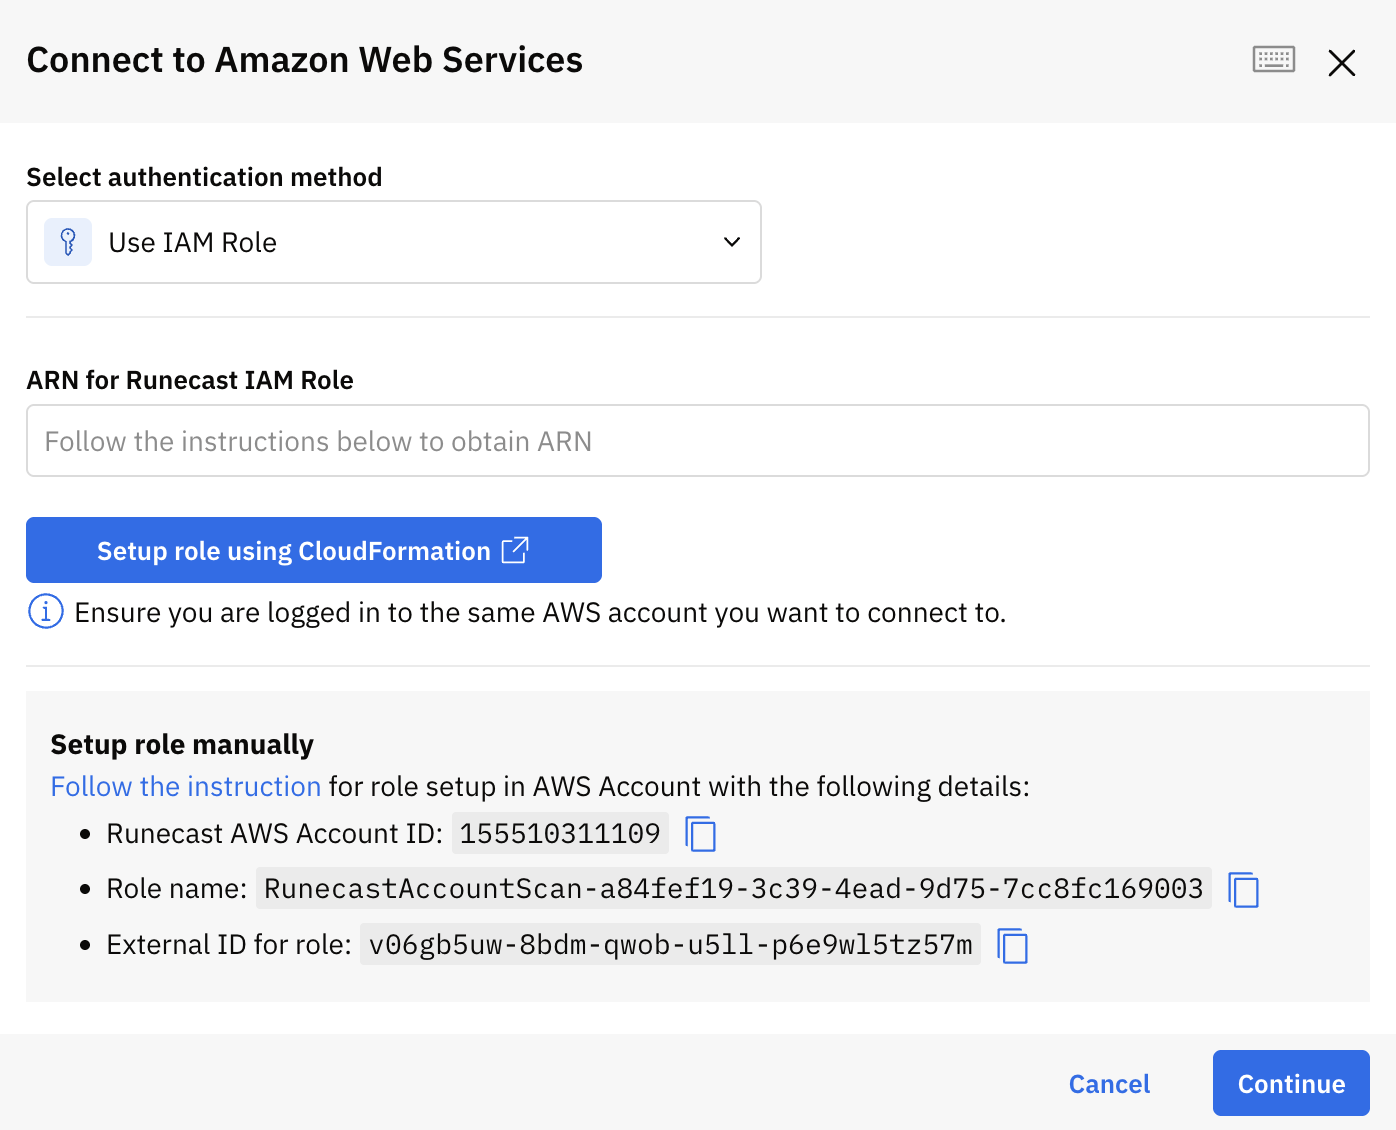
There are two options how to create such role and obtain its ARN:
- Use the Setup role using CloudFormation button to initiate the automated creation.
- It will open a new browser window and load AWS CloudFormation page with Quick create stack form and prefilled parameters.
- At the bottom of the page, acknowledge the creation of resources and click on Create Stack.
- In the list of CloudFormation Stacks filter for RunecastAccountScan and click on the stack name and then switch to the Resources section.
- Open the role from the list and copy its ARN.
- Return to the Runecast page and paste the ARN into the input field of the already opened Add Amazon Web Services form.
- Use the instructions below to create the role manually:
- Open AWS console of the desired account and select Identity and Access Management (IAM) service.
- Under Access Management -> Roles select Create Role and follow the 3 steps:
- Select Custom trust policy as Trusted entity type
- Provide the following policy definition and click Next.
Note
Make sure to replace <Runecast AWS Account ID> and <External ID for role> with values as shown in the Runecast form.
{ "Version": "2012-10-17", "Statement": [ { "Effect": "Allow", "Principal": { "AWS": "arn:aws:iam::<Runecast AWS Account ID>:>:root" }, "Action": "sts:AssumeRole", "Condition": { "StringEquals": { "sts:ExternalId": "<External ID for role>" } } } ] } - In the list of available roles, select the AWS managed ReadOnlyAccess role and click Next.
- In the last step, provide the role name as indicated in the Runecast form <Role name>, verify the the rest of the details provided in the previous steps are correct and click on Create role.
- Select Custom trust policy as Trusted entity type
- Once the role is created, access it and copy its ARN.
- Return to the Runecast page and paste the ARN into the input field of the already opened Add Amazon Web Services form.
Connection confirmation
Once the AWS connection was successfully added, you will be able to see it listed in the AWS connections table along with its status.

Microsoft Azure
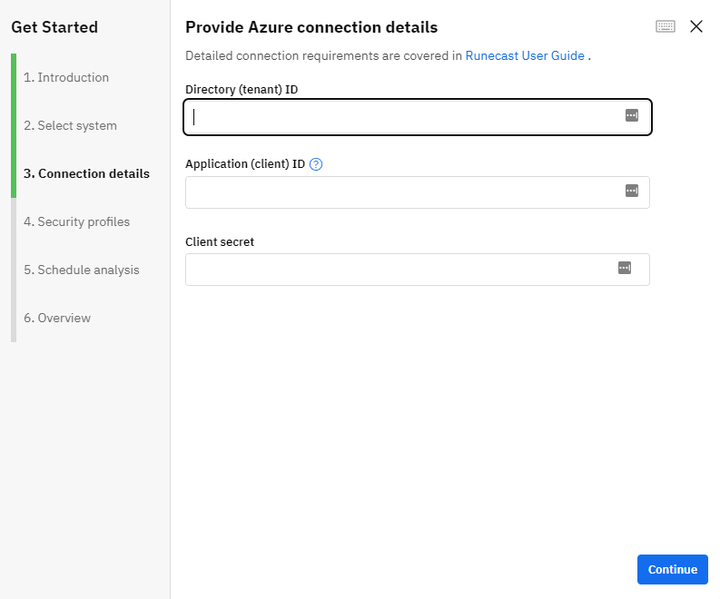
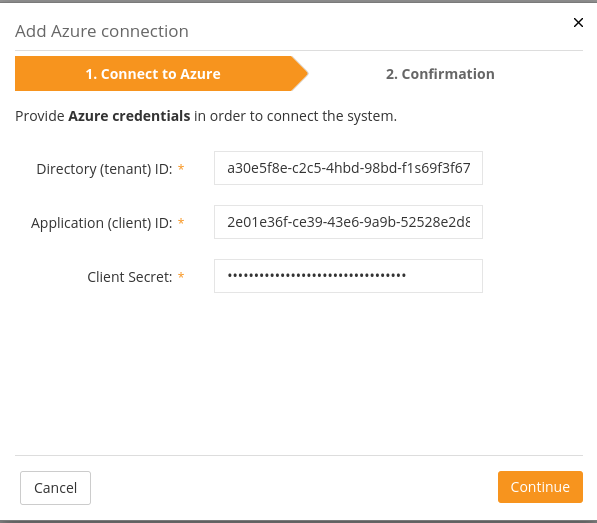
To connect to Microsoft Azure Cloud Services, click the Add Azure button and follow these steps:
-
Provide the Tenant ID and Application credentials (see steps to Create Azure Application), click Continue to the next step.
-
After confirmation was received in step 2, you will be able to see the listed Azure accounts you have logged into:

GCP
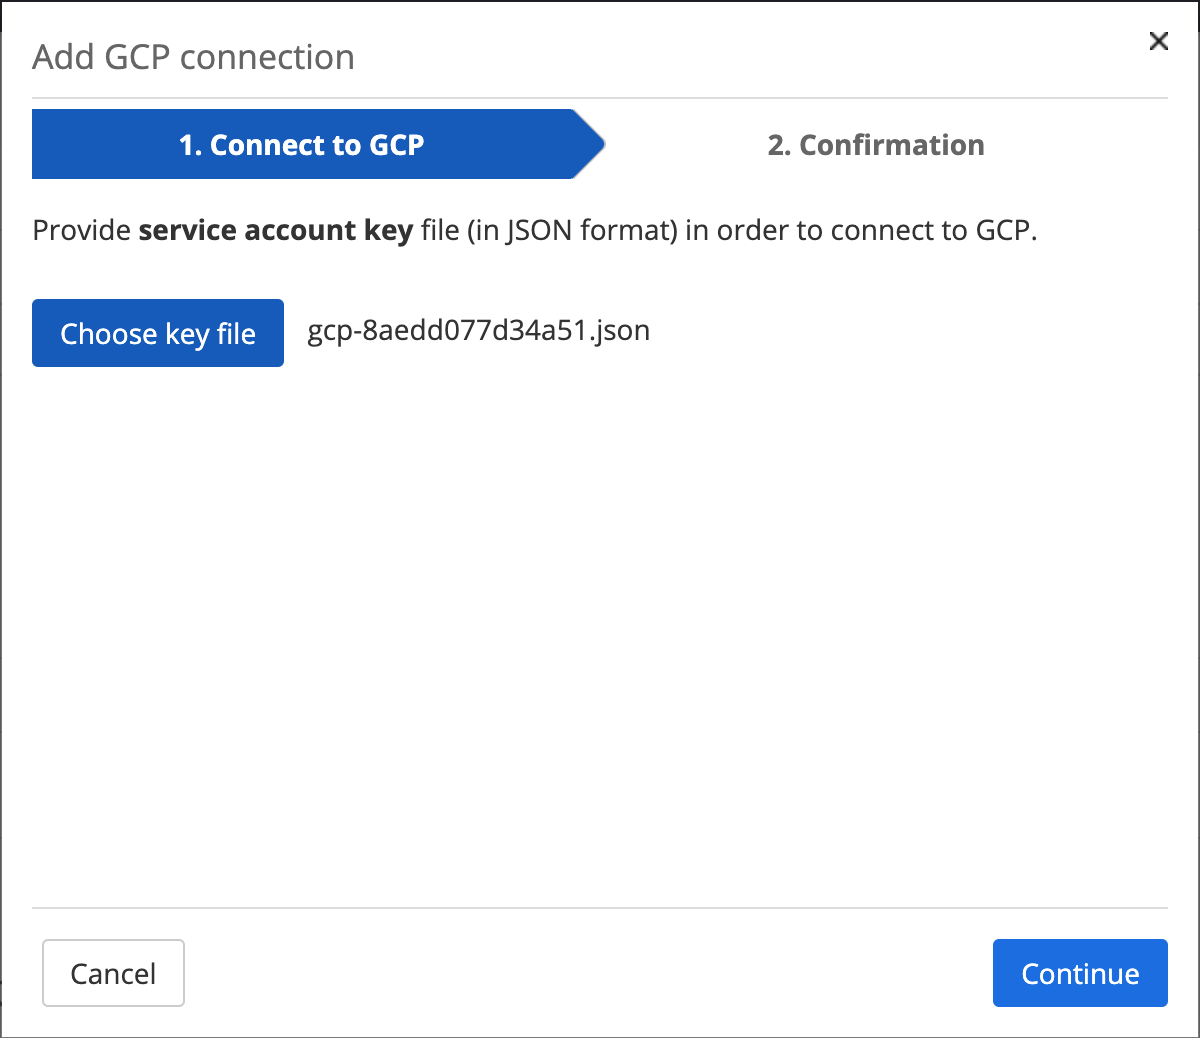
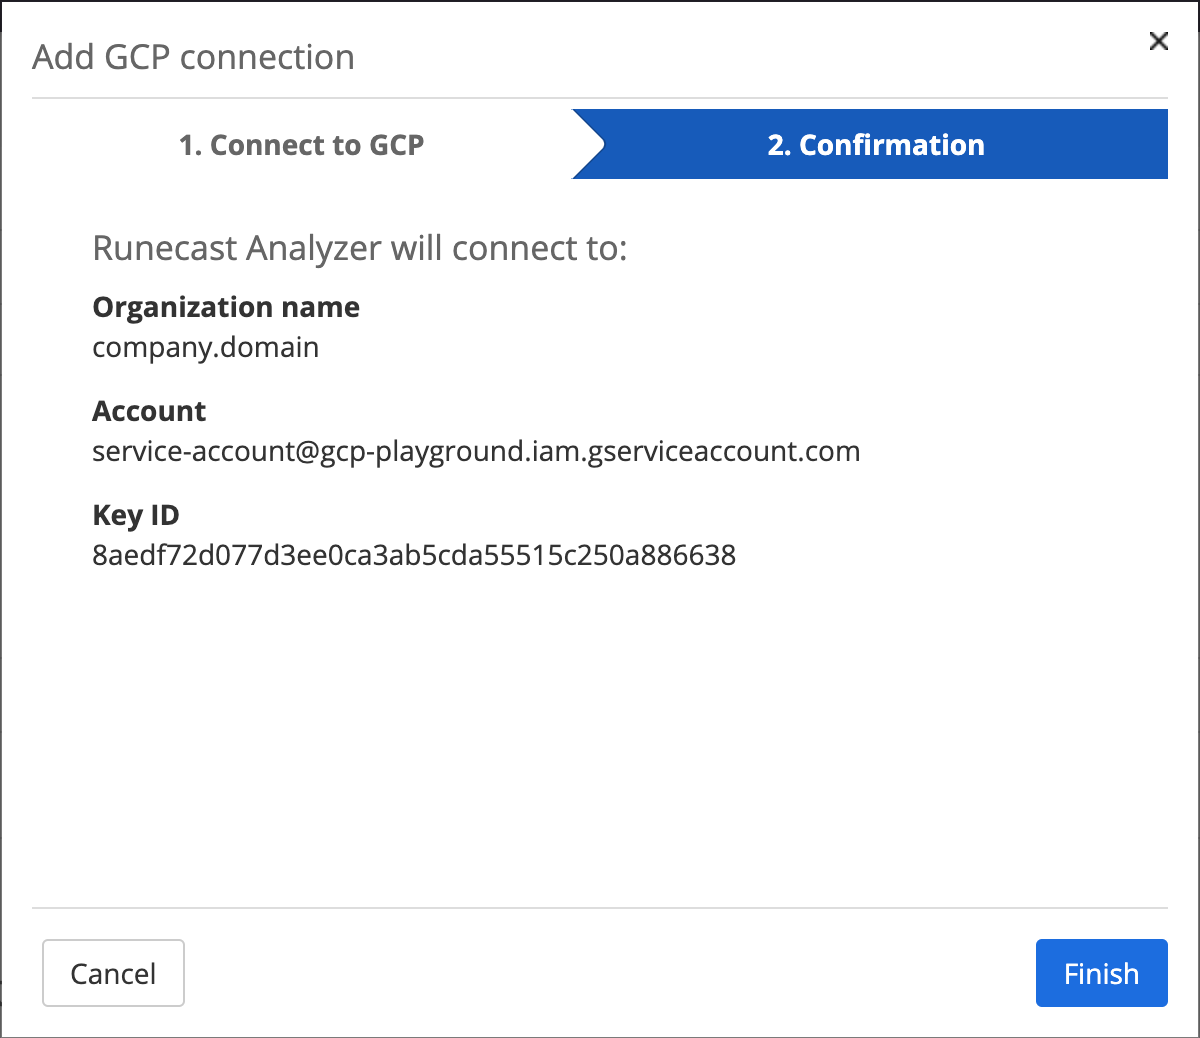
To connect to Google Cloud Platform, click the Add GCP button and follow these steps:
-
Upload the GCP service account key in json format and click Continue to the next step.
-
Review the summary about the organization and user account that will be used
-
After confirmation was received, you will be able to see the GCP connection in the table

Kubernetes
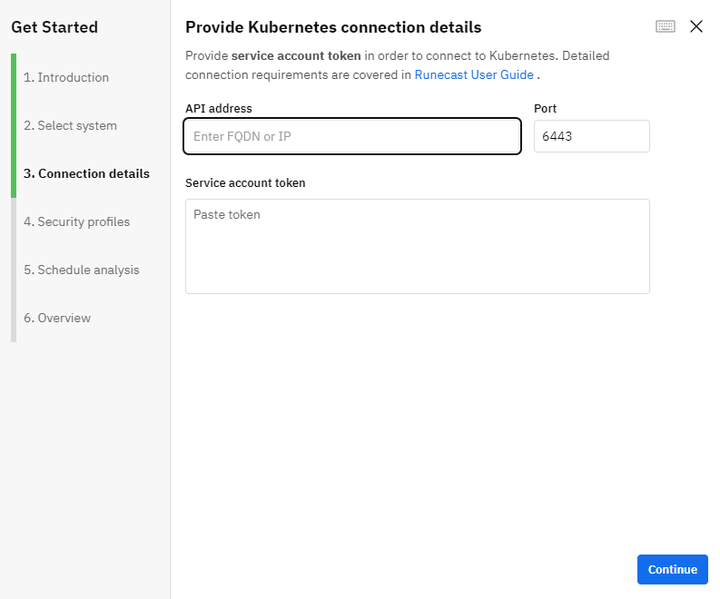
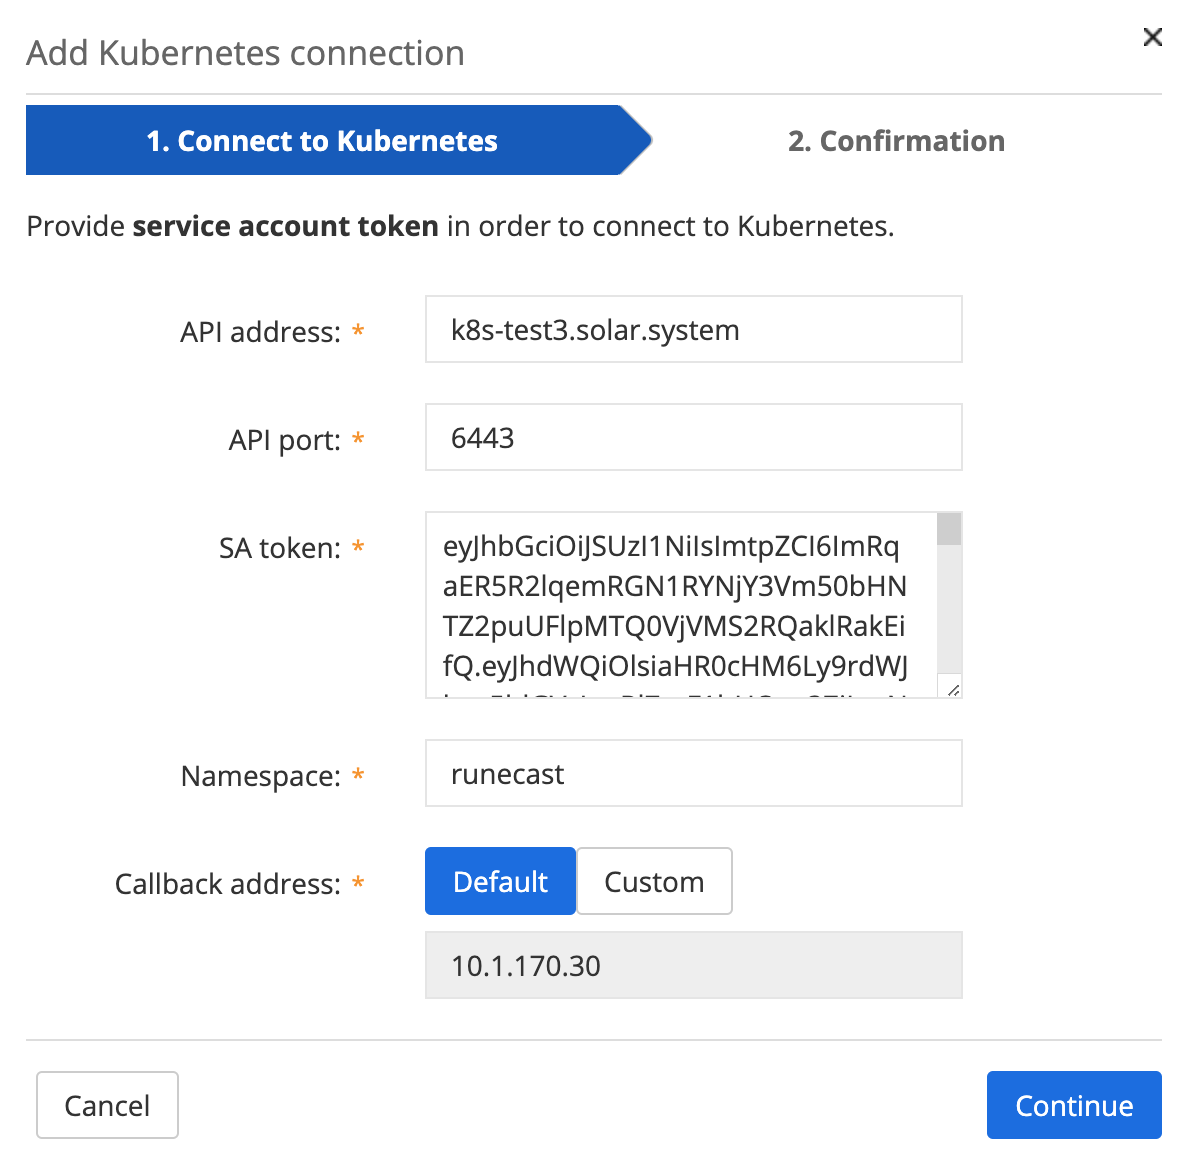
To connect to a Kubernetes cluster, click Add Kubernetes button and follow these steps:
-
Provide the following connection details:
- Kubernetes cluster API address
- API port
- Service account token - see the Kubernetes section of the System Requirements chapter to find out how to automatically create and obtain a sevice account token.
- Namespace - the namespace where Runecast Node Collector DaemonSet wil be deployed. It's set to
runecastby default and can be reconfigured as needed. - Callback address - the address by which Runecast can be reached from the analyzed cluster. By default, it's the resolved IP address of the system where Runecast Analyzer is running and can be reconfigured as needed.
-
Click Continue to proceed to the next step.
-
After confirmation was received in Step 2, you will be presented with a list of Kubernetes clusters that you have connected:

Multiple actions can be performed from the dropdown Actions button located on the right side.
VMware NSX-T
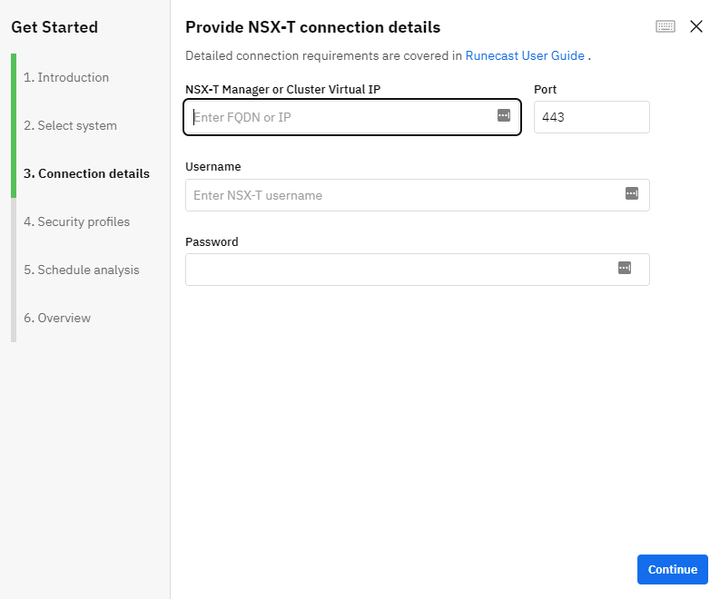
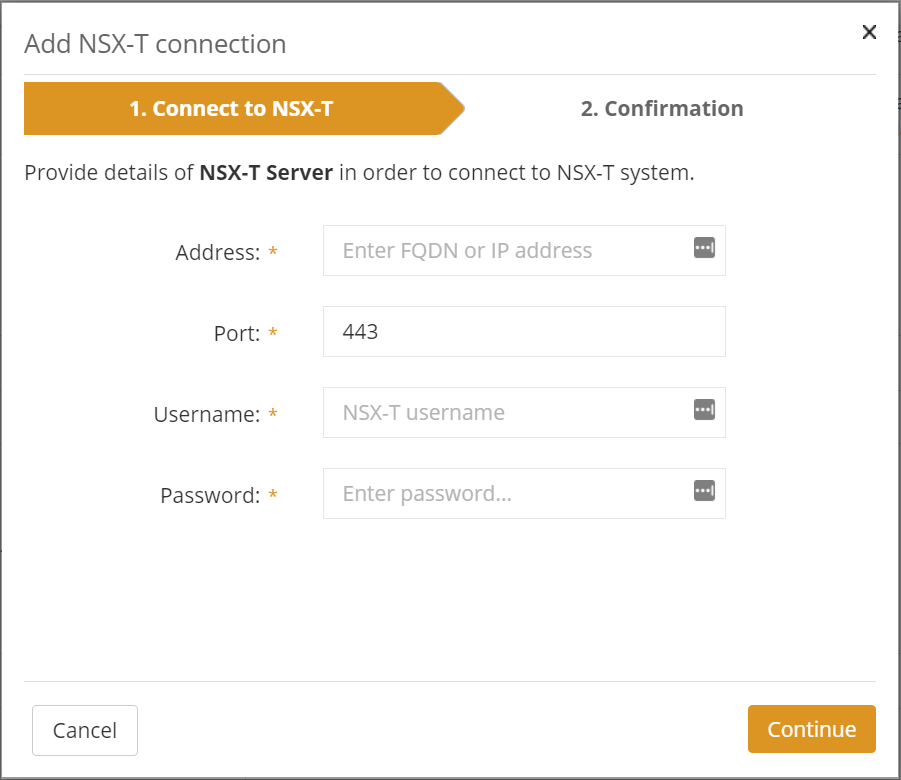
To connect to a VMware NSX-T Data Center, click the Add NSX-T button and follow these steps:
-
Provide the NSX-T information and click Continue to the next step.
-
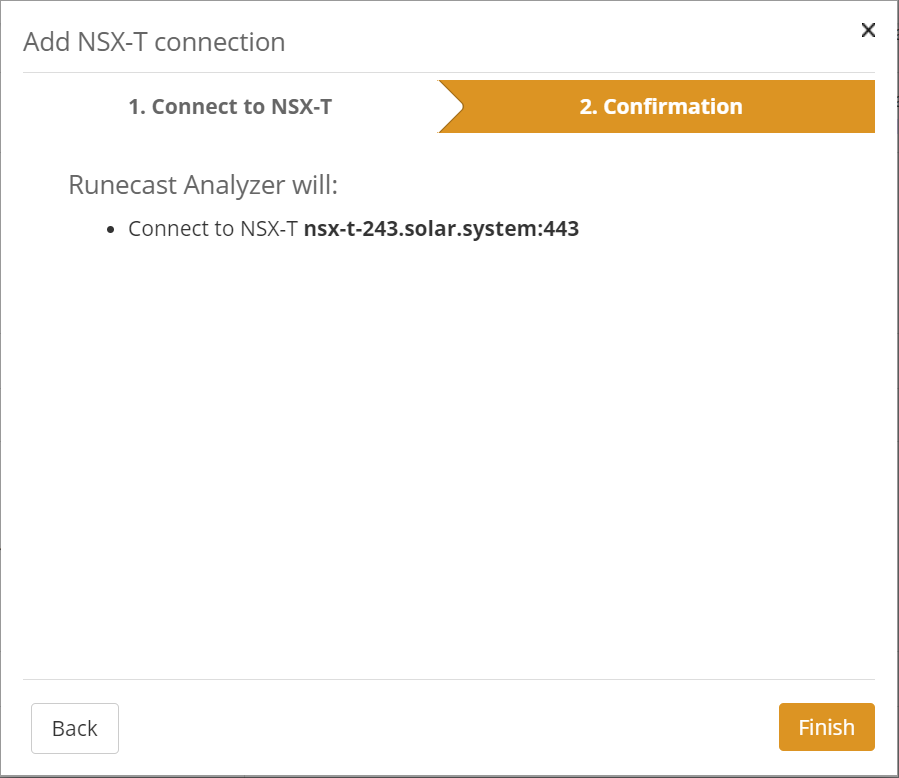
The second step will summarize the actions to be performed by Runecast Analyzer after clicking the Finish button.
-
After confirmation was received in Step 2, you will be presented with a list of NSX-T environments that you have connected.
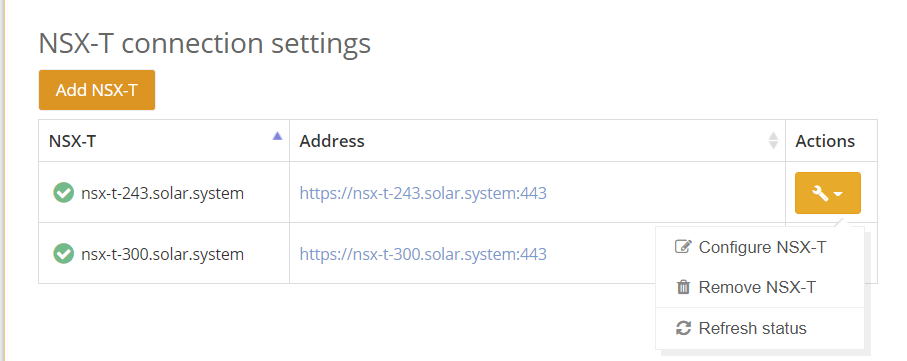
Multiple actions can be performed from the dropdown Actions button located on the right side.
VMware Cloud Director
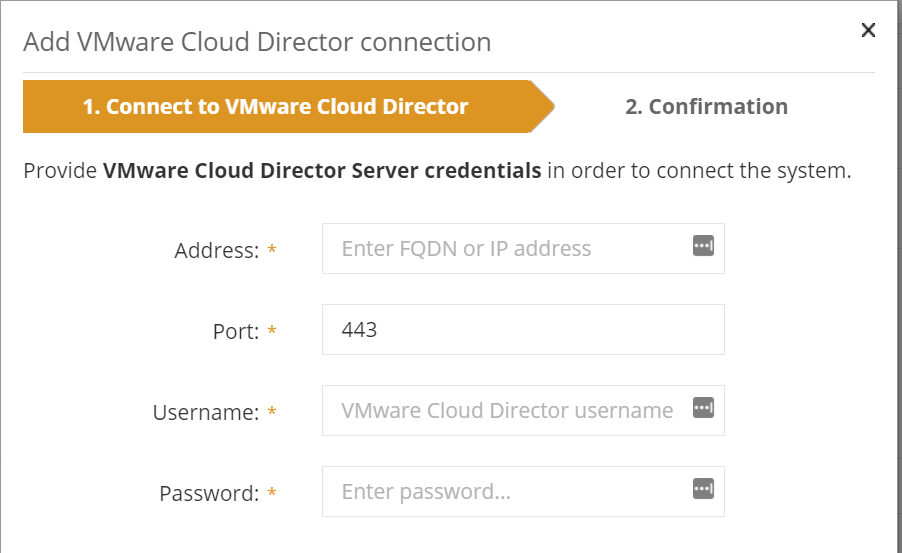
To connect to VMware Cloud Director, click the Add VMware Cloud Director button and follow these steps:
-
Provide the vCD information and click Continue to the next step.
-
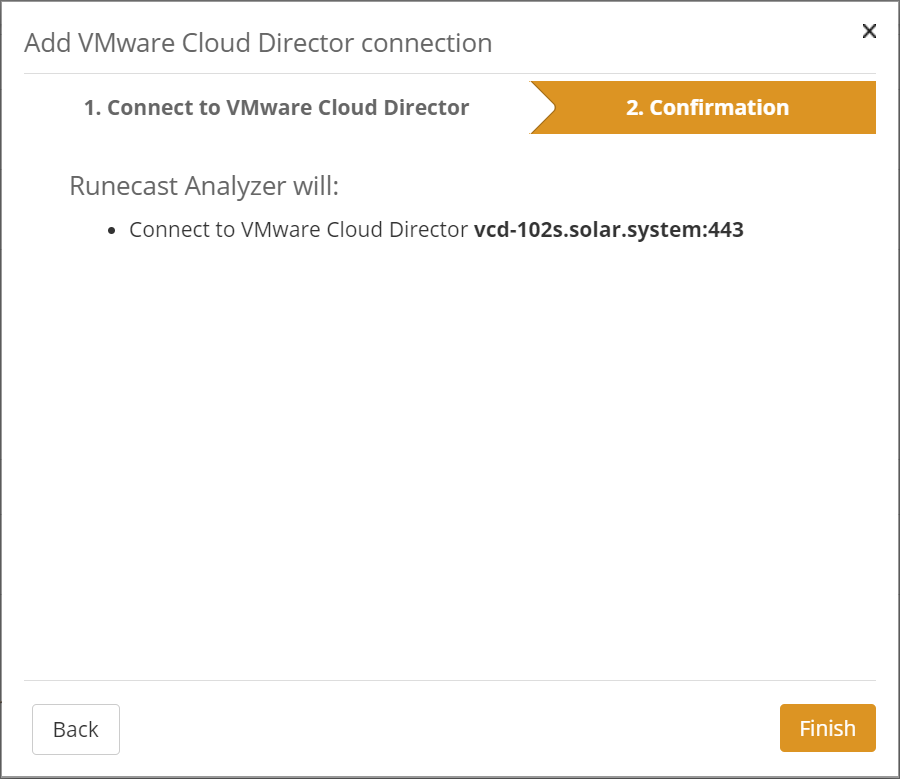
The second step will summarize the actions to be performed by Runecast Analyzer after clicking the Finish button.
-
After confirmation was received in Step 2, you will be presented with a list of vCD instances that you have connected.
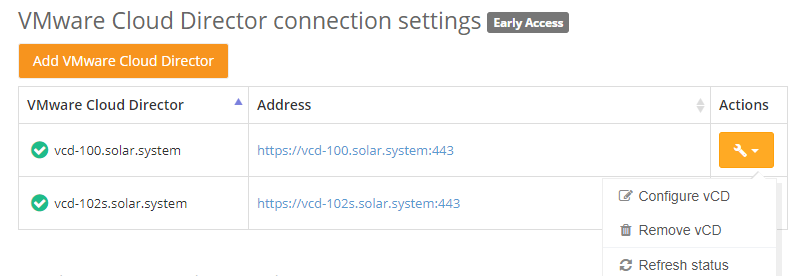
Multiple actions can be performed from the dropdown Actions button located on the right side.
Operating Systems
Note
Before enabling OS Analysis, please see the System Requirements chapter.
To enable the Operating Systems (OS) Analysis, click the Activate OS Connection button and follow the steps:
-
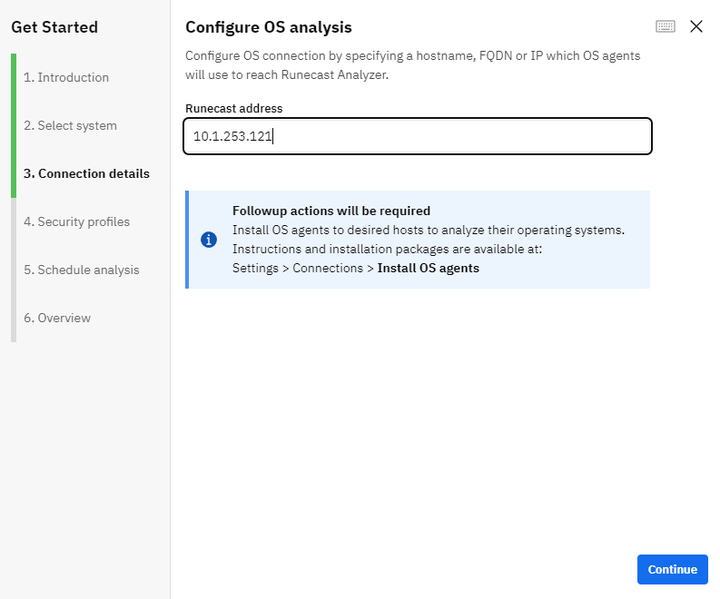
Enter the hostname, FQDN or IP Address, that will be used by the OS agents to access Runecast Analyzer and press Continue.

-
After few moments you will be presented with confirmation that the OS analysis service was enabled.

-
Press Finish to confirm. You will then find the Operating Systems item with relevant information on the Connections page.

-
Click on Install OS agents. You will be presented with a dialog that will allow you to download the customized installation packages (MSI, RPM, or DEB). Please see the deployment steps for information about deploying the OS agents to the operating systems.
-
After the OS agents are deployed, you can find the number of registered agents and display their information after clicking on Show OS agents.

Analyzing systems
-
Click the Analyze Now button on the top navigation bar to perform an initial analysis.
-
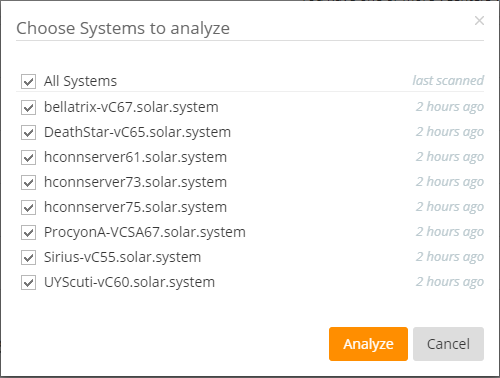
If only one System is configured it will be scanned. If multiple Systems are connected, you can choose which of the Systems to analyze. You can select them all or choose specific ones.
-
After the analysis process has completed (the time taken can vary depending on number of Systems selected to be scanned and the size of the environments) you can navigate to the dashboard and various views to see the results.